The Kurki windshields got their aluminium framesSunnuntai 14.5.2017 - Member of Tuesday Club During the autumn of 2016 the Tuesday Club fit new polycarbonate windshields to the I.V.L.K. 1 Kurki as the original celluloid ones had met their end during the long storage. In addition to this the three missing side-supports were made and installed. These were already covered in the December 2016 blog. However the making of the aluminium wind-screen edge-stiffeners was due this year. The original windscreens had been strengthened using a grooved aluminium edge-stiffeners. A few small pieces of the original ones had survived, and with these as a model we could make new ones. From the surviving pieces we could also establish that the edge stiffener of the cockpit windscreen was a bit wider than that of the windscreen of the passenger compartment. The reason for this remains unclear.
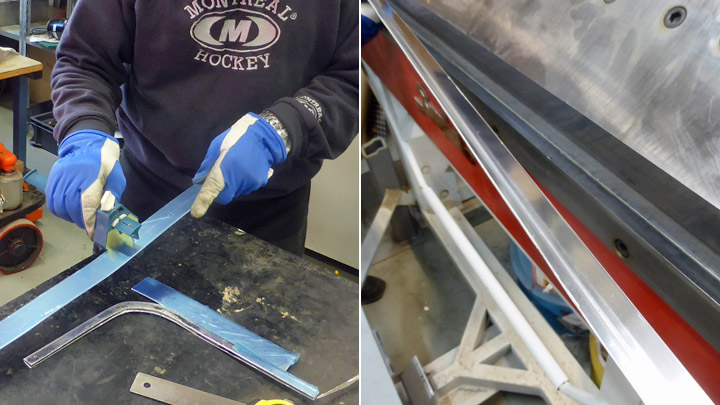
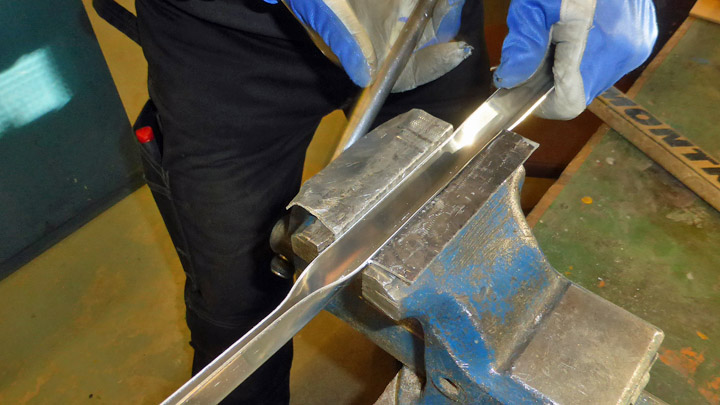
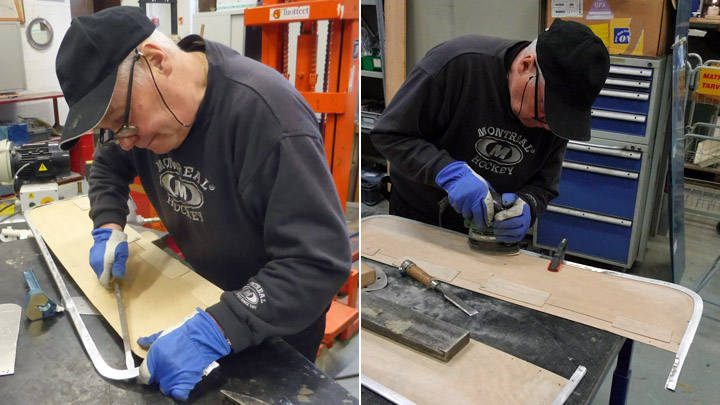
We started with the edge-stiffener for the cockpit windscreen. From a 1mm thick aluminium sheet we cut a piece with appropriate length and width. Then we made a 90 degree longitudinal bend to it using a sheet-bender. After this it was forced in a vice to make a groove. Now we faced the trickiest part of the job – shaping the groove-shaped piece to the shape of the windscreen edge with its rounded corners.
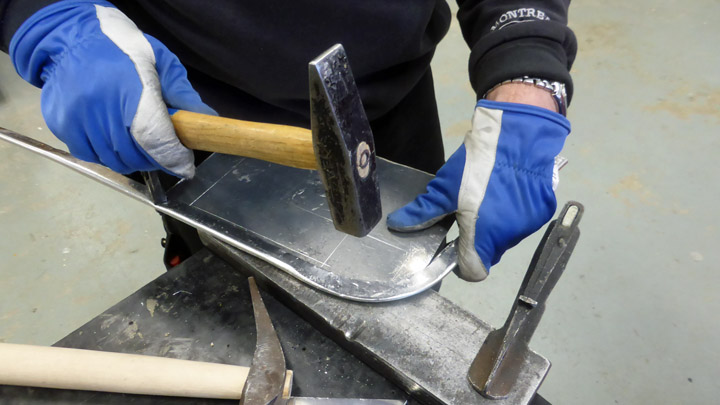
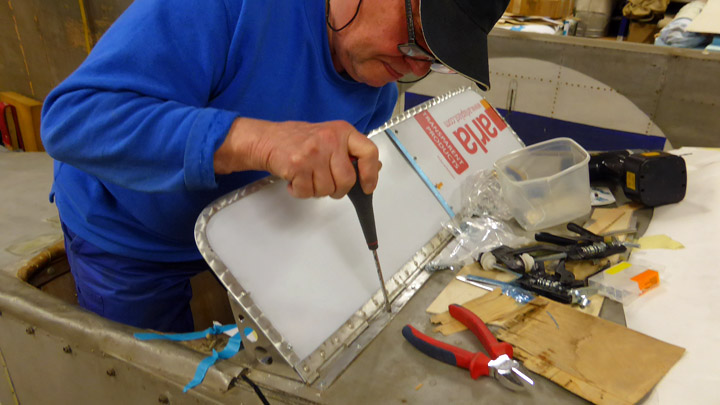
The edge-stiffener was hammered into shape against an inserted steel plate whilst simultaneously bending it to give it the proper curvature. Step by step we moved towards the final shape.
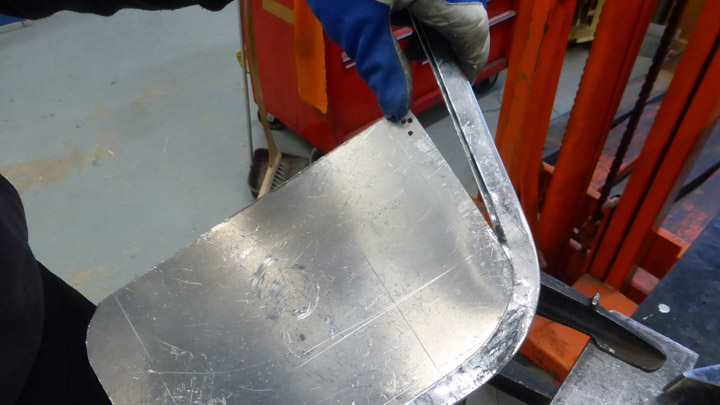
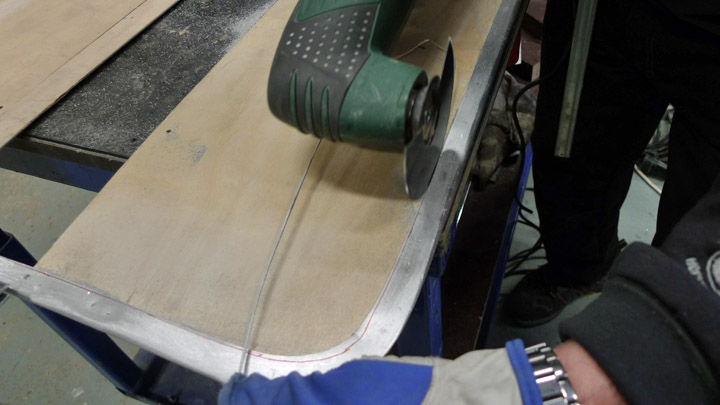
When the preliminary shaping of the cockpit windscreens edge-stiffener had been done we proceeded to make the passenger-compartment windscreen edge-stiffener. First we made it with the same width as that of the cockpit edge-stiffener. When both edge-stiffeners had been given their rough form their forming was tuned using plywood models of the actual windscreens, to which they were fitted and their fit stepwise refined until it was fine. Their tightness was ensured by squeezing to proper fit. When we were satisfied that they were OK, they were test-fitted to the actual windscreens. They fit nicely, and now the passenger-compartment windscreen edge-stiffener was cut to its final width.
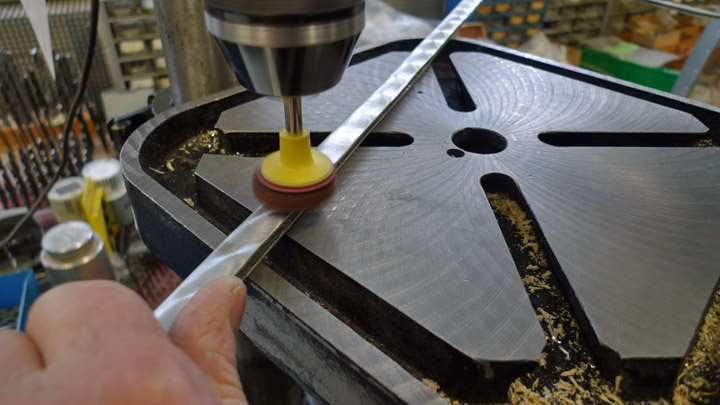
Now the edge-stiffeners were ready for finishing. First their surface was ground smooth and then polished. Then they were given the typical 1920ies perlée finish, as we were able to see traces of such a finish on the surviving original pieces.
The perlée finish was applied using a grinding-pad of 30 mm diameter in a drill-press. The pattern was such that it covered all of the surface. When the surface finishing was done, the edge-stiffeners were put in place on the windscreens and secured using small bolts.
We still had to add the aluminium laths at the outside of the windscreens at the point of the triangular support brackets. Before securing the lathes in place using small bolts going through the windscreens we gave the laths the same perlée finish we had given the windscreen edge-stiffeners.
Now we could finally fasten the windscreens to the fuselage of the Kurki. The base-lathe of the foldable cockpit windscreen was secured to the fuselage using brass-screws (as it would not be proper to use modern torx or other modern types of screws when working on a 1920ies plane). The passenger compartment windscreen base-plate was secured to the plywood fuselage surface using 3x10 mm bolts as originally in 1927.
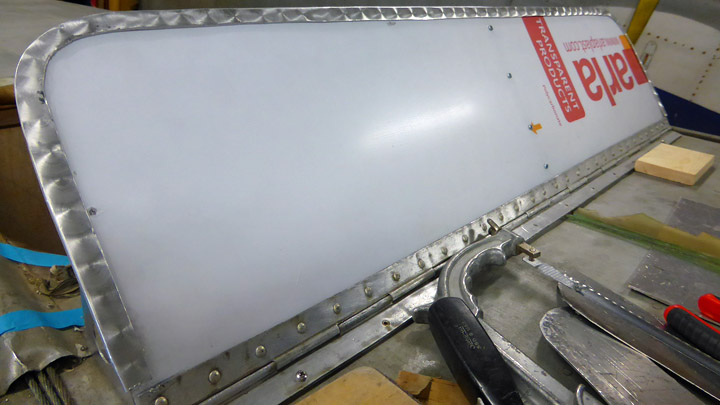
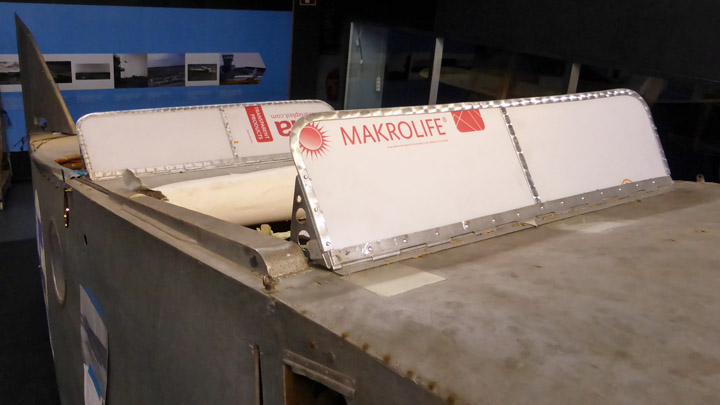
The windscreens of the cockpit and the passenger-compartment had now been finished – well not completely. The plexi-glass screens still had their plastic-film protective cover in place. They will be removed only when the work on the Kurki-fuselage has been completed and the I.V.L. K.1 Kurki returned to the Päijänne-Tavastia Aviation Museum in Vesivehmaa next autumn. In this way we can avoid damaging the windscreens during our continuing work on the Kurki fuselage. |
|
Avainsanat: aviation history, restoring, old aircraft, I.V.L. K.1 Kurki |
Repairing old and building new wing-struts for KurkiMaanantai 27.2.2017 - Member of Tuesday Club Two of the total of six wing-struts for the I.V.L. K.1 Kurki were found at the Päijänne-Tavastia Aviation Museum at Vesivehmaa. The found struts were the front- and the (diagonal) mid-struts. The struts were damaged, but repairable. However, a total of six struts are needed for the Kurki, three on each side, so four more have to be made. The existing struts will be used as templates for the new ones. As we have no models and no drawings of the Kurki have survived, we have assumed that they are similar in construction to the front-struts.
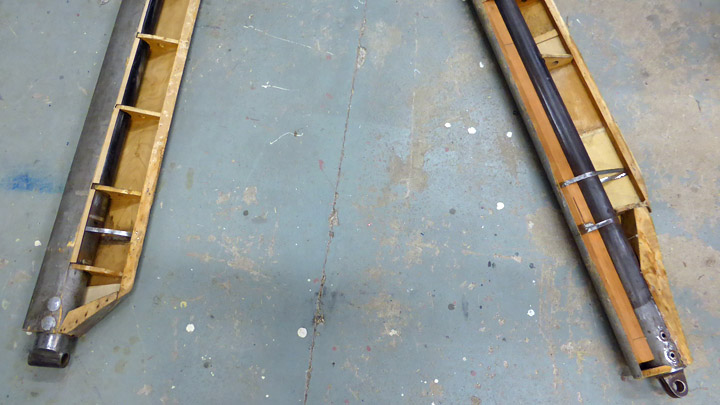
The two found wing-struts were damaged. Their plywood coverings had holes in them and they were partly rotted. The rotted parts must be replaced, and the holes must be mended. The rotted parts will be removed all the way to good plywood and new plywood will be put in in its place. Fixing the holes is underway in the well-proved Tuesday-Club manner – a square or rectangle is drawn around the hole and the cut is made in the plywood along the lines, the cut-out faulty piece is removed and replaced with a new piece of fresh plywood.
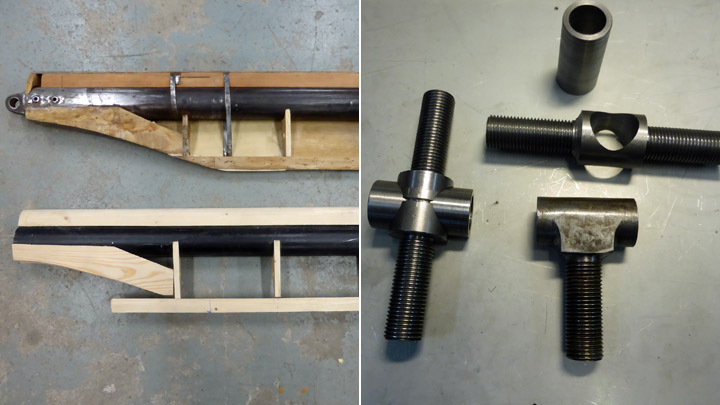
Having to remove the rotten wing-strut covering plywood was actually a blessing in disguise. Doing this, revealed the inner construction of the wing-strut. Thus we got the knowledge on how to make the missing struts. Removing the rotten covering plywood revealed that the main load-carrying part of the strut was a steel tube with an outer diameter of 52 mm. Attached to this was the solid-wood leading edge of the strut and the plywood-covered wooden ribs and the wooden trailing edge giving the strut its aerodynamic form. At both ends of the struts there were wooden support structures and a metal lug at each end for fastening the strut to the fuselage and the wing.
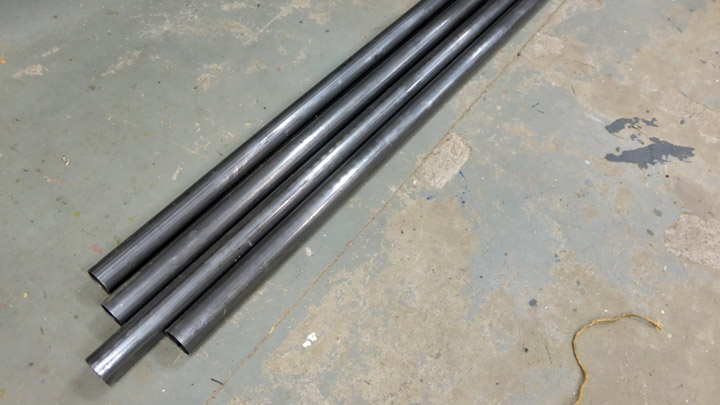
With the existing struts as models plans for the making of the four missing struts and a list of materials needed were made. As we were unable to source any steel-tube with the right diameter we had to settle for a 50.5 mm one. This was considered close enough for the purpose. Finding the necessary wood-materials for the making of the leading- and trailing edges was a piece of cake.
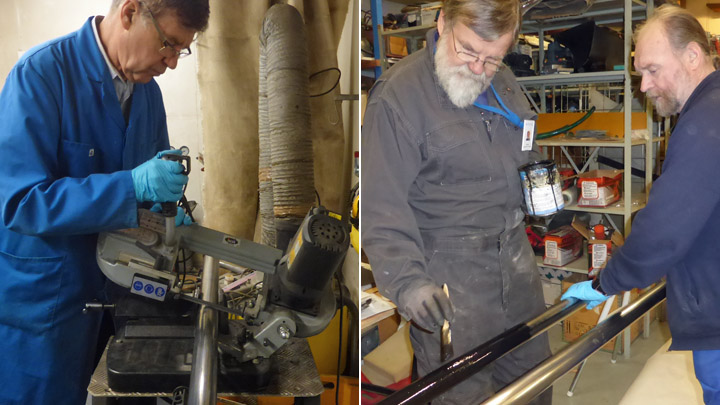
We started making the new wing-struts from the 3 m long steel tubes. The tubes were cleaned of their protecting grease and cut to measure. The tube for the front- and rear struts is 262 cm long and that for the mid-strut 273 cm. After being cut to measure the tubes were painted using black Isotrol varnish.
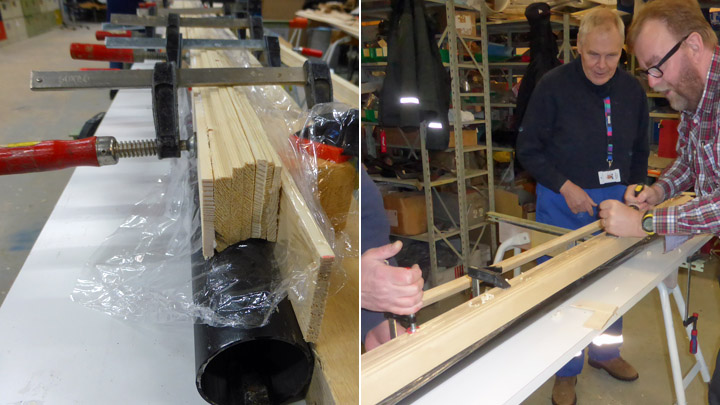
We decided to start by making the other middle strut. First the tube was firmly fastened to the purpose-built work-foundation. For the making of the wooden leading-edge we first cut 0.5 cm thick strips out of a piece of wood the length of the tube. These were glued together pushed against the tube, giving the back part roughly the shape of the tube and a rough leading-edge that was then planed and sanded to shape of the original leading edge.
The finished leading-edge was then fastened to the tube using four countersunk screws, with their heads sunk deeply into the leading-edge, after which the holes were plugged using wooden plugs. Thus the leading-edge was finished and it was time to tackle the trailing-edge.
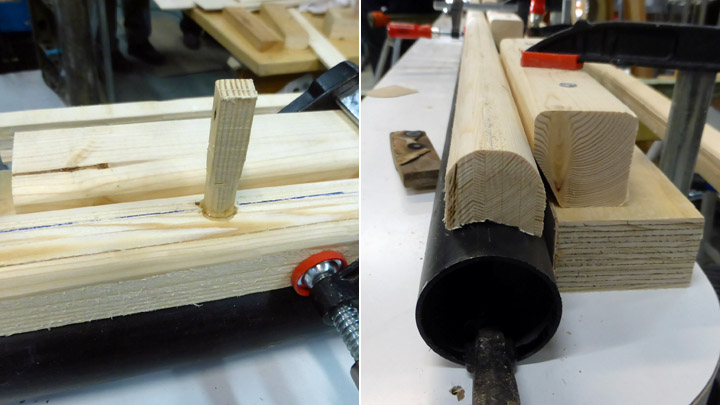
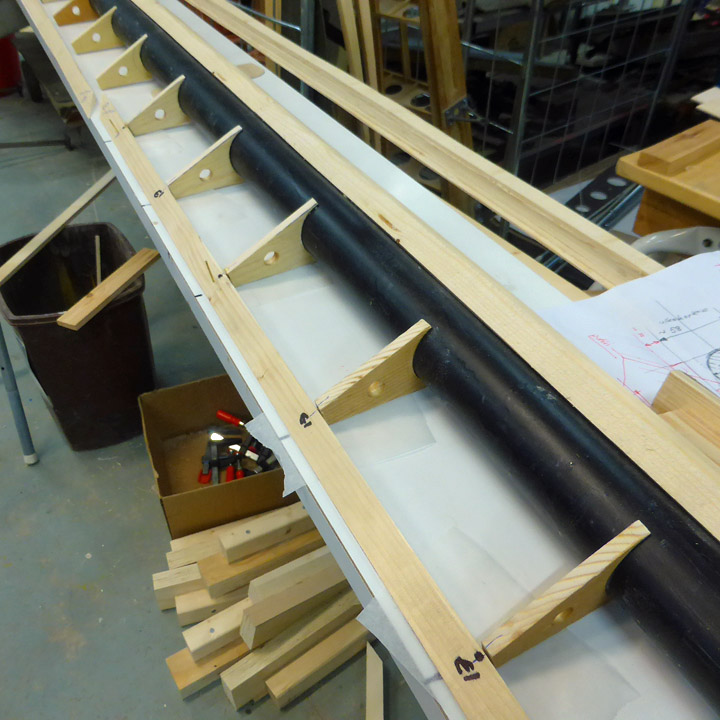
From the original wing-struts we got the models for the trailing-edge ribs, of which we made some dozens to start with, and then we varnished the sides of the ribs. A strut will take 14-16 ribs. The needed ribs were fitted into place and glued to the tube using epoxy-adhesive – yes, we know epoxy was not used in the 1920’ies but… Then we made the wooden trailing-edge and glued it into place using epoxy-adhesive. Now the main parts of the wing-strut were done.
It was still lacking the solid-wood support-structures at each end as well as the metal fastening lugs. These are now being made in our workshop. We decided to make all the missing wing-struts up to this stage, before continuing with the finishing work and covering of them all. Work on the missing front wing-strut is already ongoing. |
|
Avainsanat: aviation history, restoring, old aircraft, I.V.L. K.1 Kurki |
Ilmailumuseot.fi - Aviationmuseums.fi